Nail art has become a popular form of self-expression and creativity, offering a way to showcase personal style right at your fingertips. For beginners, diving into the world of nail art can feel overwhelming with countless techniques, designs, and tools available. However, you don’t need to be an expert to create beautiful nail art. This comprehensive guide will provide simple yet stunning designs that are perfect for beginners, along with essential tips and techniques to get you started.
Nail art allows you to express your creativity and make a statement without saying a word. Here are some reasons why nail art is appealing, especially for beginners:
Nail art provides an excellent opportunity to express individuality. You can choose colors, patterns, and designs that reflect your personality or mood, making each manicure unique.
Sporting well-done nail art can boost confidence and make you feel more put-together. It’s a small but impactful detail that can elevate your overall look.
Engaging in nail art can be a fun and relaxing activity. Experimenting with different styles and designs can offer a sense of accomplishment and creativity.
Nail art is a skill that can be developed over time. Starting with simple designs allows you to build your confidence and skills, paving the way for more complex projects.
Before getting started on your nail art journey, it's important to gather the necessary tools and products. Having the right supplies will help you create stunning nail designs with ease and frustration-free.
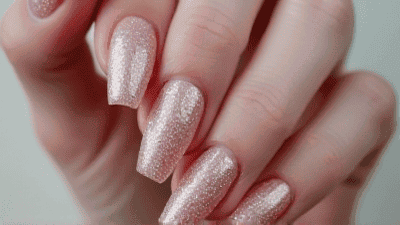
Nail Polish: Invest in a variety of nail polishes, including base colors, topcoats, and a selection of vibrant shades. Consider getting some glitter and metallic polishes for extra flair.
Base Coat: A base coat is crucial for protecting your natural nails and ensuring that your nail polish adheres well.
Top Coat: A good quality top coat adds shine, protects your nail art from chipping, and prolongs the life of your manicure.
Nail Art Brushes: A few fine-tipped detail brushes will help you create intricate designs. A wider brush can also help with filling in larger areas.
Dotting Tools: Dotting tools come in varying sizes and are perfect for creating dots, which can be used in various designs.
Striping Tape: This thin tape is excellent for creating clean lines and geometric designs.
Makeup Sponges: Sponges are perfect for blending colors and creating gradient effects.
Nail Stamps and Stamping Plates: Nail stamping is a quick and easy way to achieve intricate designs without advanced skills.
Tweezers: Use these to handle small embellishments like rhinestones or small stickers.
Cotton Pads and Acetone: These are essential for cleanup and correcting any mistakes you may make while applying your designs.
Nail Polish Remover: Use acetone-free nail polish remover to avoid drying out your nails.
Cuticle Oil: Regular application of cuticle oil keeps your cuticles healthy and moisturized.
Nail File and Buffer: Keep your nails shaped and smooth with files and buffers to create a polished look.
Before you start creating beautiful nail art, proper nail prep is essential. Here’s how to get your nails ready for painting:
Start by washing your hands thoroughly and removing any old nail polish. This ensures you have a clean surface to work with.
Use a nail clipper to trim your nails if necessary, and follow up with a nail file to shape them into your desired style—whether that's squared, oval, or almond.
Gently push back your cuticles using a cuticle pusher or an orangewood stick. This creates a clean edge and allows for better polish application.
Lightly buff the surface of your nails with a buffer to create a smooth canvas. This step helps the polish adhere better.
Finally, apply a thin layer of base coat to protect your natural nails and enhance polish adhesion. Allow it to dry completely before moving on to your nail art.
Here are some easy yet eye-catching designs perfect for beginners. Each design includes step-by-step instructions to help you recreate these looks at home.
Polka dots are a timeless and fun nail art design that is incredibly easy to create.
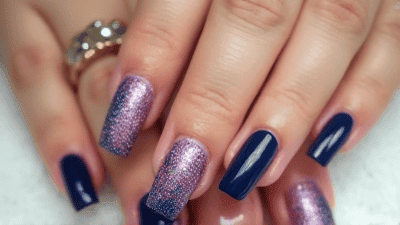
Stripes add a chic and modern look to your nails. This design is versatile and can be achieved with any color combination.
Gradient nails create a beautiful ombre effect and are a great way to blend two or more colors.
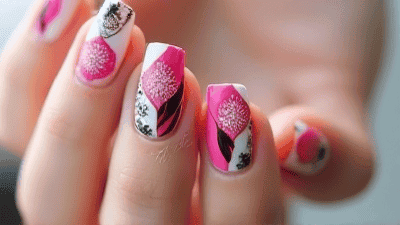
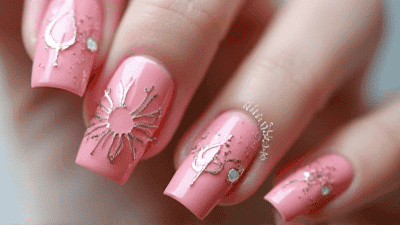
Floral designs can be easily created with just a few simple strokes. This design looks elegant and is lovely for spring or summer.
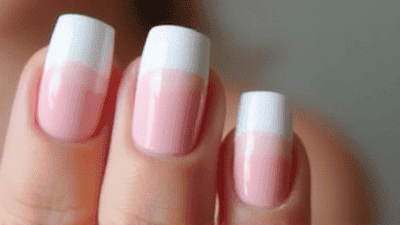
Give the classic French manicure a stylish twist by using bright colors or glitter.
Animal prints like leopard spots and zebra stripes are trendy and easy to create.
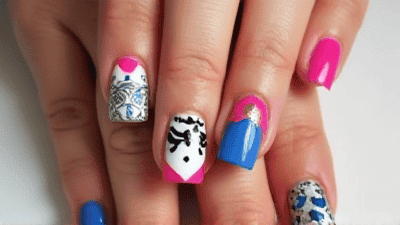
Abstract designs allow for creativity and expression through various colors and shapes.
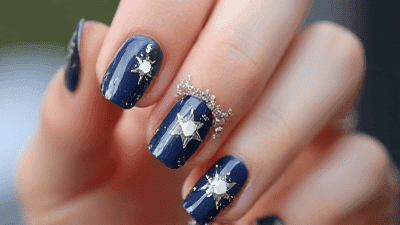
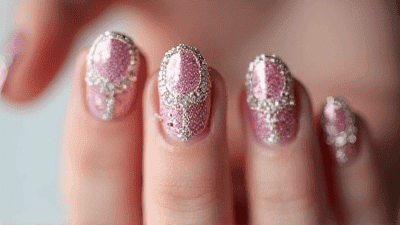
Add a touch of glam with jewel accents. This design is easy and adds sophistication.
Tailor your nail designs to reflect the seasons. Here are a couple of ideas:
Even when starting with nail art, you might encounter some challenges along the way. Here are common issues and suggestions to help you navigate through them:
If your polish appears streaky, ensure you are applying thin layers and allowing each coat to dry before adding new ones. Use quality polishes that promise even application.
Bubbles can form when polish is shaken too much. Instead, roll the nail polish bottle between your palms to gently mix it before application. Apply polish in thin layers to reduce bubbling.
To avoid smudging your art, ensure that each layer is dry before moving on to the next. Using a quick-dry topcoat can help seal designs faster.
If you're struggling with creating clean lines, practice is key. Use striping tape for straight lines or clean brush strokes for designs that require precision.
When removing nail polish, use acetone-free remover to prevent dryness. If polish is stubborn and requires extra effort, use cotton pads soaked in remover placed on your nails for a minute before wiping.
While creating beautiful nail designs is enjoyable, healthy nails are essential for a polished look. Here are some nail care tips to keep your nails in great condition:
Apply cuticle oil daily to keep your cuticles hydrated. Healthy cuticles contribute to overall nail health and help prevent hangnails.
Allow your nails to breathe by giving them a break from polish every few weeks. This helps prevent staining and maintains their strength.
A diet rich in vitamins and nutrients supports healthy nail growth. Include foods high in biotin, zinc, and protein for the best results.
Opt for gentle, acetone-free nail polish removers and hydrating base coats and top coats to protect your nails from damage.
Wear gloves when cleaning or using harsh chemicals to avoid exposure that could lead to nail damage or irritation.
Nail art can be a delightful journey filled with creativity and exploration. As a beginner, remember that practice is essential, and mistakes are part of the learning process. With each attempt, you'll improve your skills and develop your personal style.
Start with simple designs, gradually incorporating more complex patterns as you feel comfortable. Don’t hesitate to experiment with colors, placements, and techniques. Nail art is about having fun and expressing yourself, so allow your creativity to shine through.
As you enjoy your nail art journey, consider hosting nail art parties with friends, sharing tips, and showcasing your designs. It can be a wonderful way to connect and even inspire others to explore the art form.
Create stunning nail designs using this guide as inspiration. Gather your tools, get creative, and enjoy the art of nail painting. Happy nail art crafting!